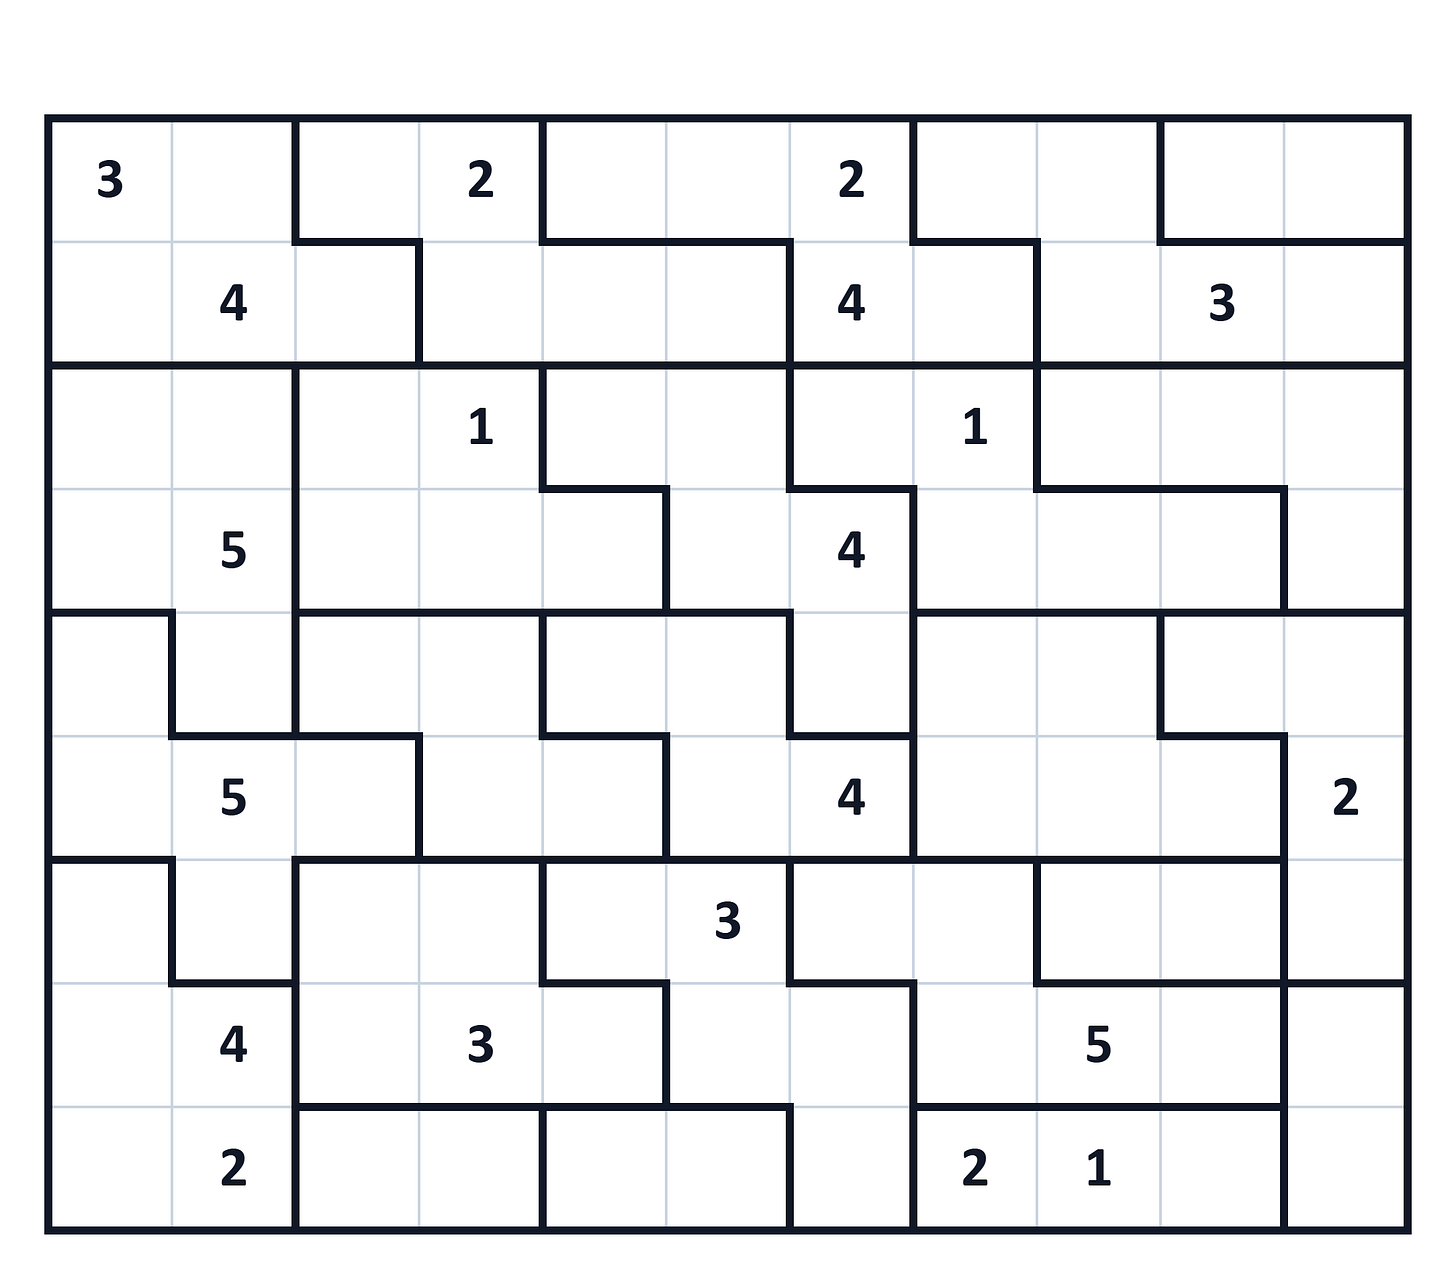
Next in the Beyond Sudoku series of articles is the Tectonic grid. Originally called Nanba Burokku, it was invented by Japanese puzzle inventor Naoki Inaba. In different magazines you will find it under the names Tectonic, Suguru, Number Blocks, but I know it as Tectonic, so I will use this name in this article. This puzzle with simple rules is another example of how simple rules can create a fun and challenging puzzle.
And Now, the Rules
Fill every region with numbers from 1 to the size of the region.
The same numbers can’t touch, even diagonally.
A one-cell region therefore always has the number 1.
And that’s it, three simple rules. The puzzle consists of several regions of different sizes and shapes which need to be filled with numbers ranging from 1 to the size of the region, meaning the number of cells the region has.
If you don’t read the description, you could probably mistake it for some kind of Jigsaw Sudoku variant. The hardest thing while solving, at least for me, is not trying to use the Sudoku rule that numbers must be unique in each row and column. I discovered this puzzle fairly recently after years of solving grids where numbers are unique in rows and columns.
The shapes of the regions have a crucial role in solving the puzzle, but not in the same way as in Star Battle, where the shapes dictate where you place the stars. Here, they will help you, or sometimes not help you, deduce the location of the next number by making it easier to eliminate cells where that number can’t be placed.
Most of the puzzles you will find will have a region size capped at 5, as in the classic puzzle, but regions can be bigger, especially in different variants.
Let’s take a deep dive into the puzzle and see what can help us solve it!
Solving a Tectonic
For this small tutorial, we will use a 6×7 grid. As always, R1-R6 stands for Rows 1 to 6, and C1-C7 stands for Columns 1 to 7. A specific cell would be written as R1C1 for the first cell in the first row and first column.
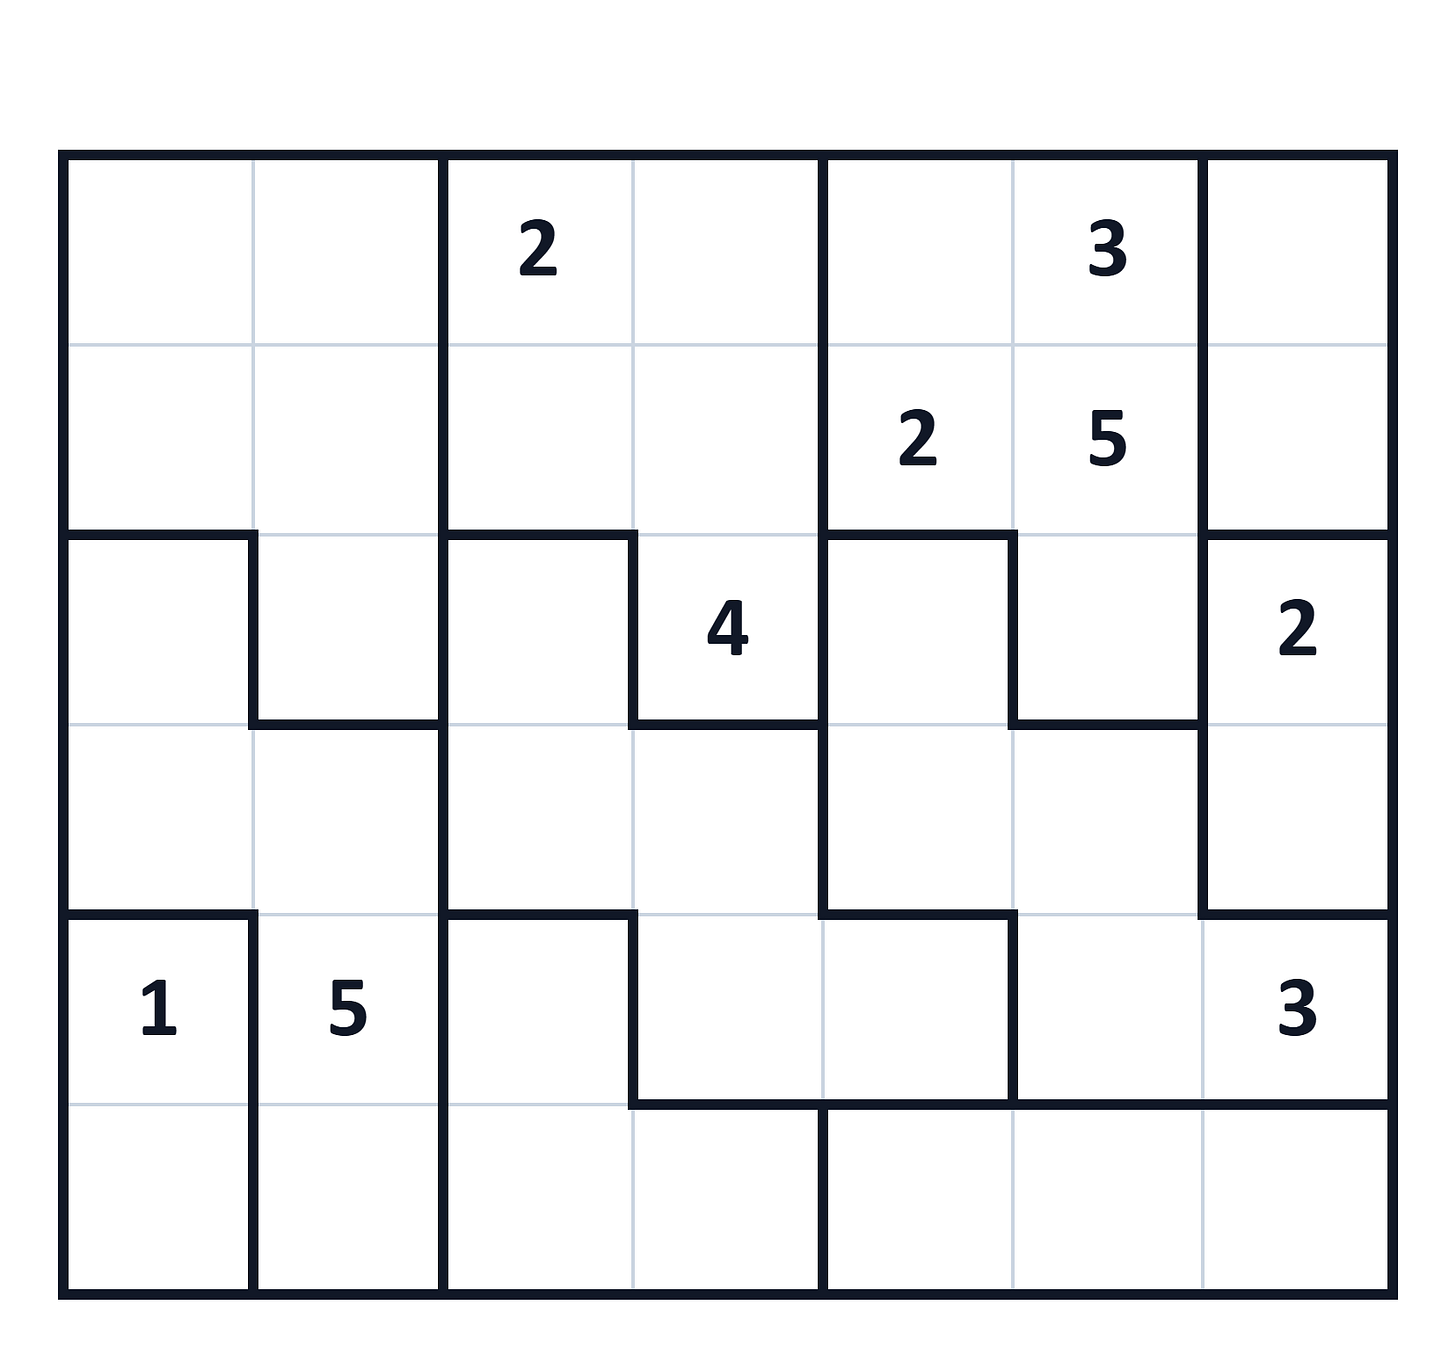
Now let’s start from the fairly obvious place, R4C7. As the rule states, every region needs to contain unique numbers from 1 to N, where N is the size of the region. The only number missing in this region is 1.
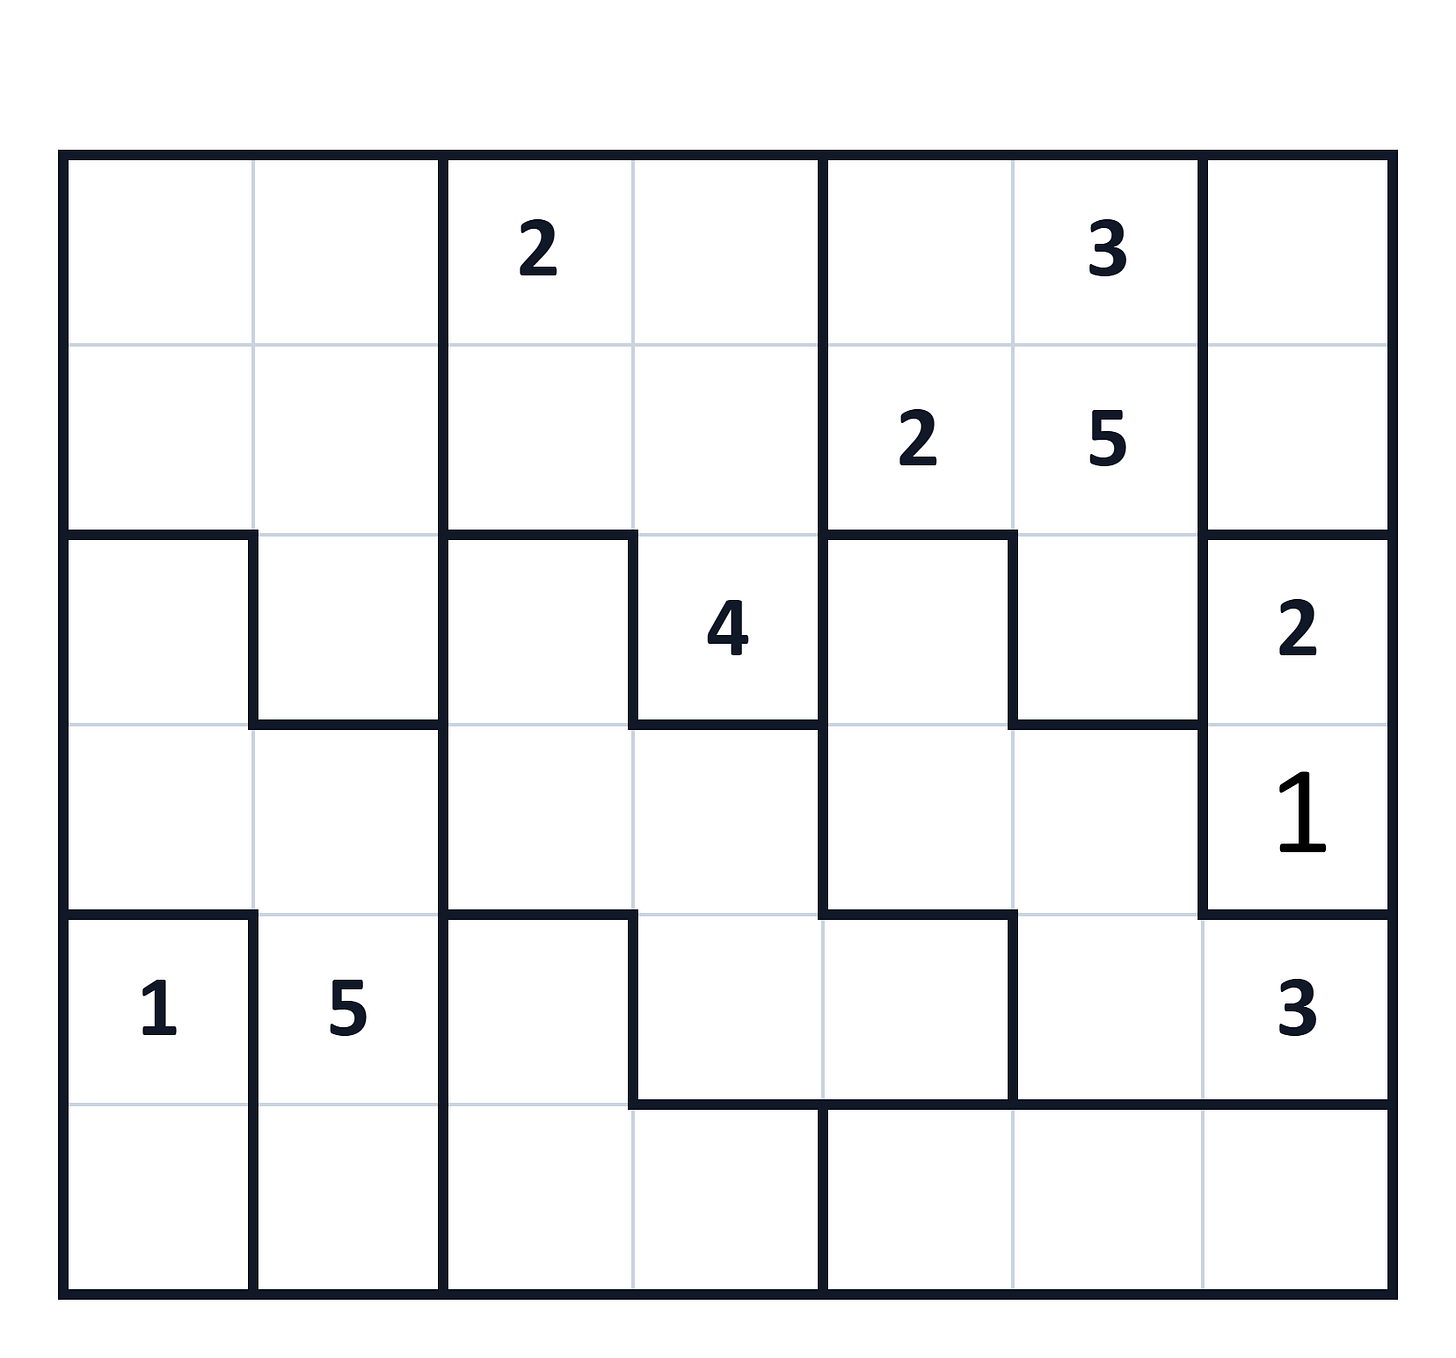
Now let’s move one region up. This is also a 1,2 region, and from the rule that two of the same numbers can’t touch, we know that R2C7 can’t be 2, so it must be 1. Cell R1C7 must then be 2.
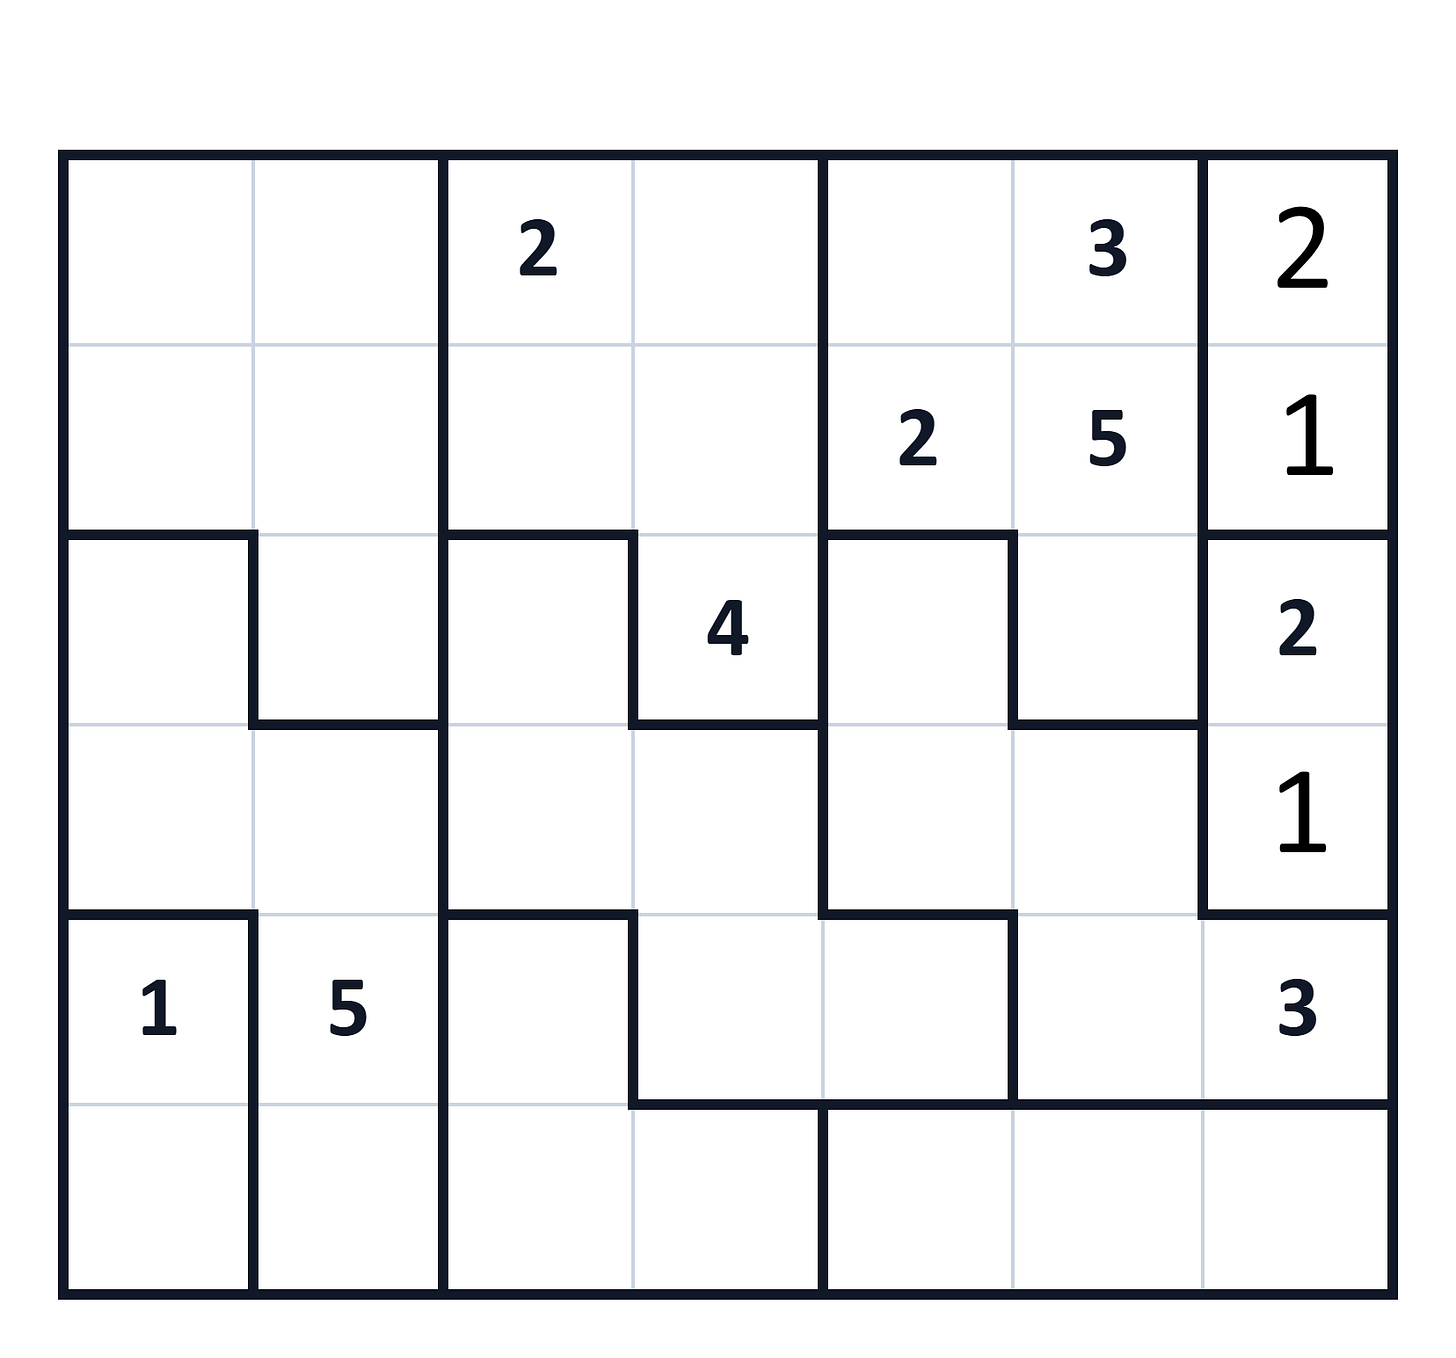
The neighbouring region is missing two numbers, 1 and 4. As this is a five-cell region, it must contain all the numbers from 1 to 5. We can see that R3C6 can’t be 1 because we already have 1s in neighbouring cells, so we place 4 there and 1 in R1C5.
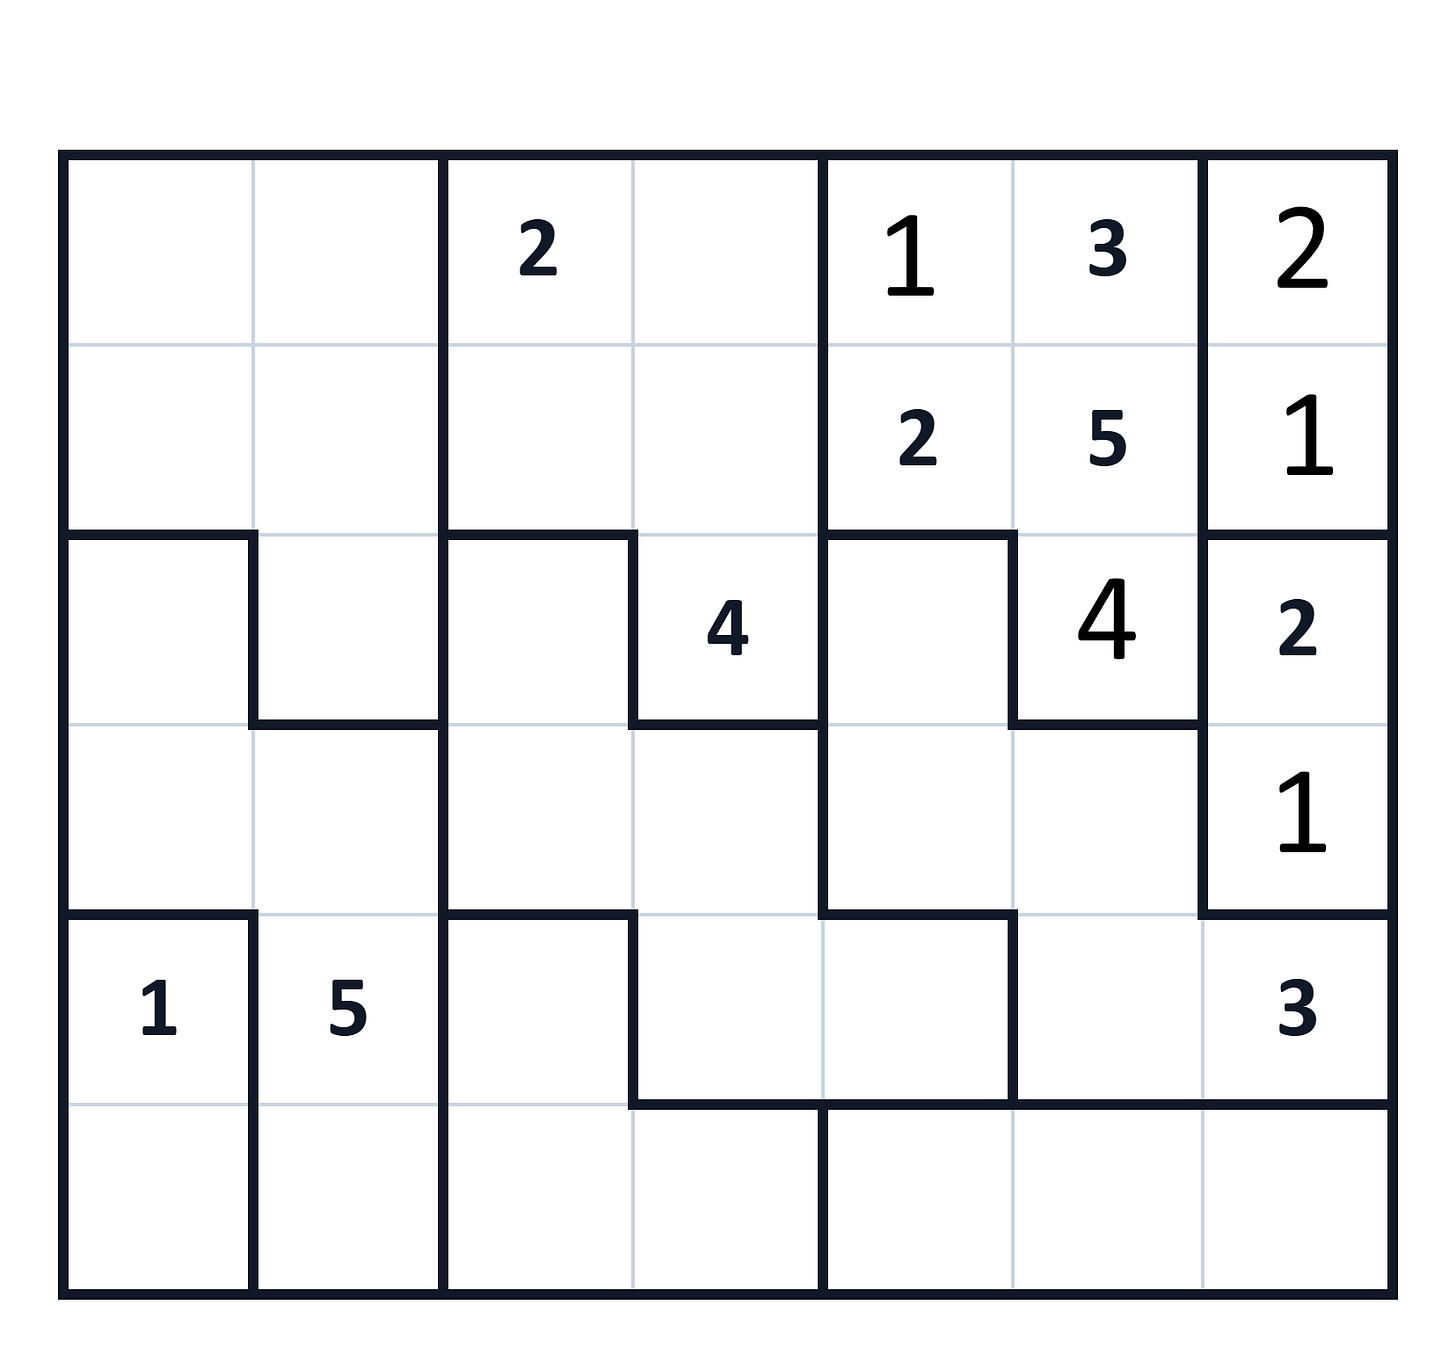
Now we can fill R6C1, where the only possible number is 2. Cell R2C3 is the only cell in that region where we can place 1, and R6C5 is also the only possible cell in its region where we can place 3 because neighbouring numbers block all the other cells.
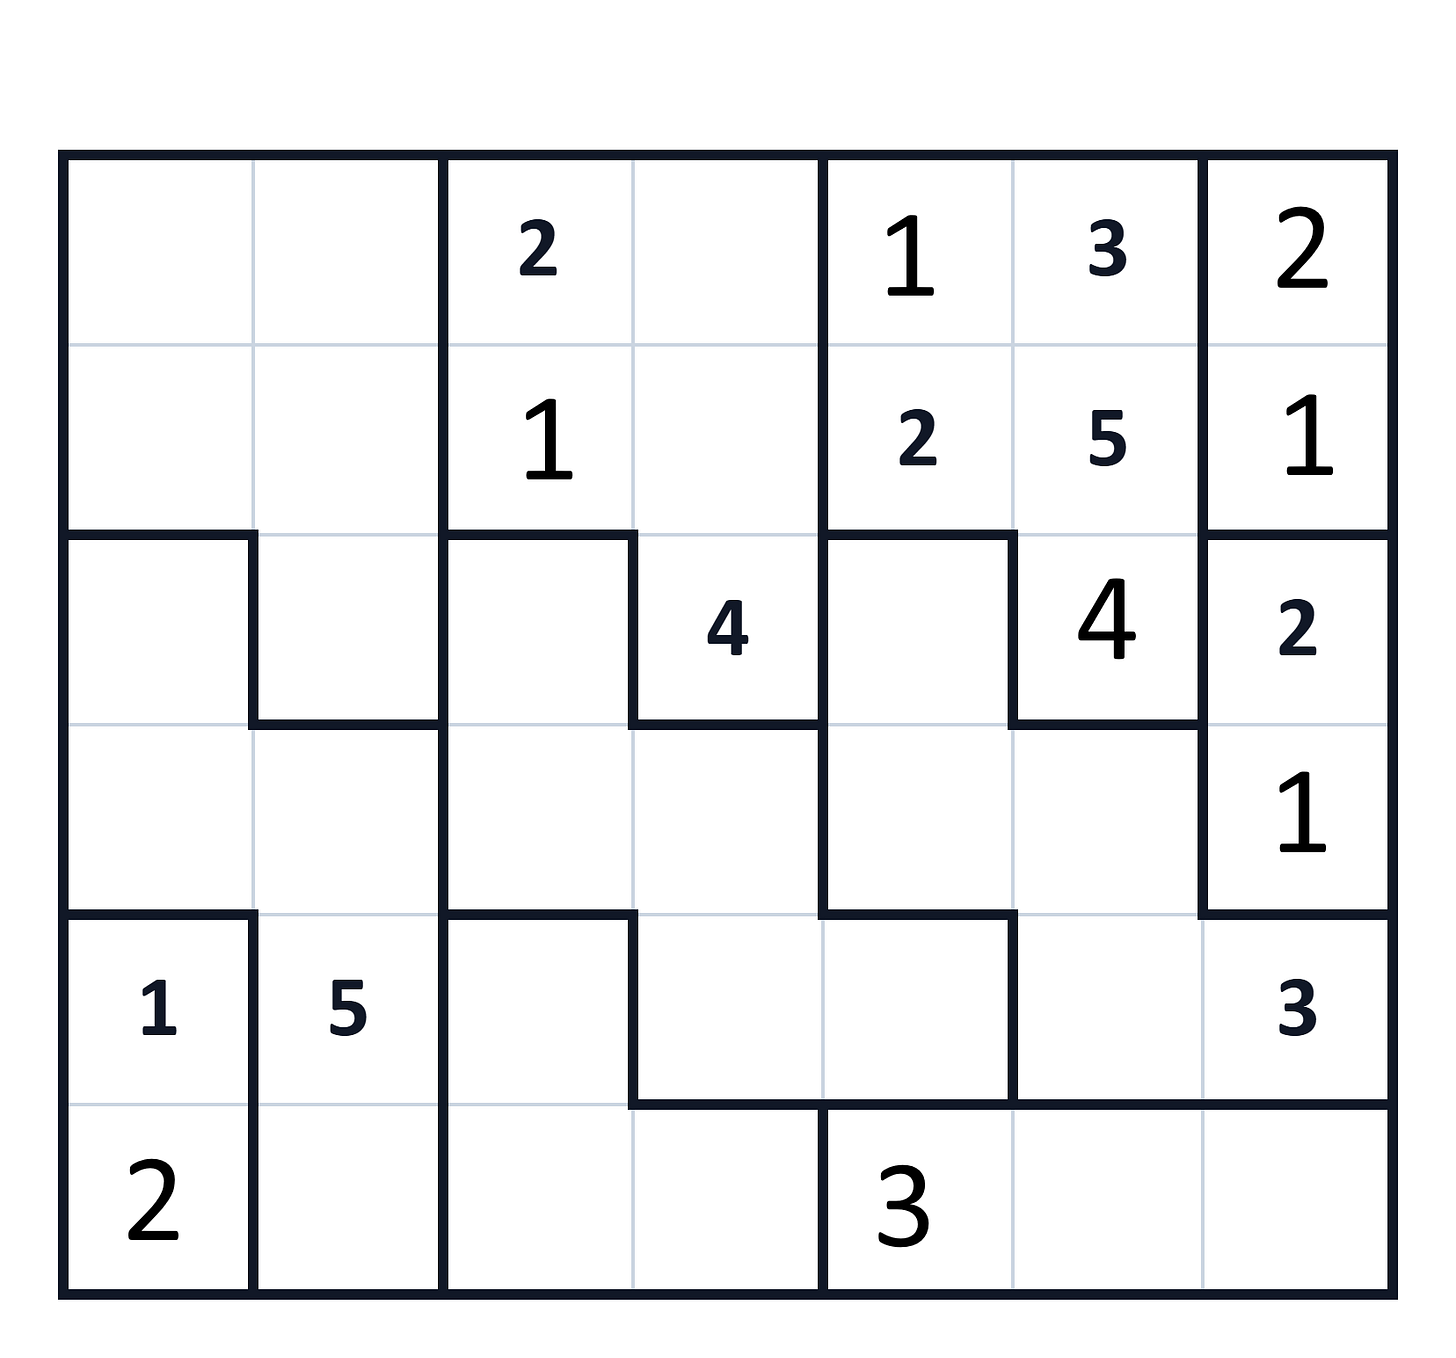
The next move is to take a closer look at R4C6, which is in a five-cell region. We can see that its neighbouring cells already contain numbers from 1 to 4, so we can place 5 there.
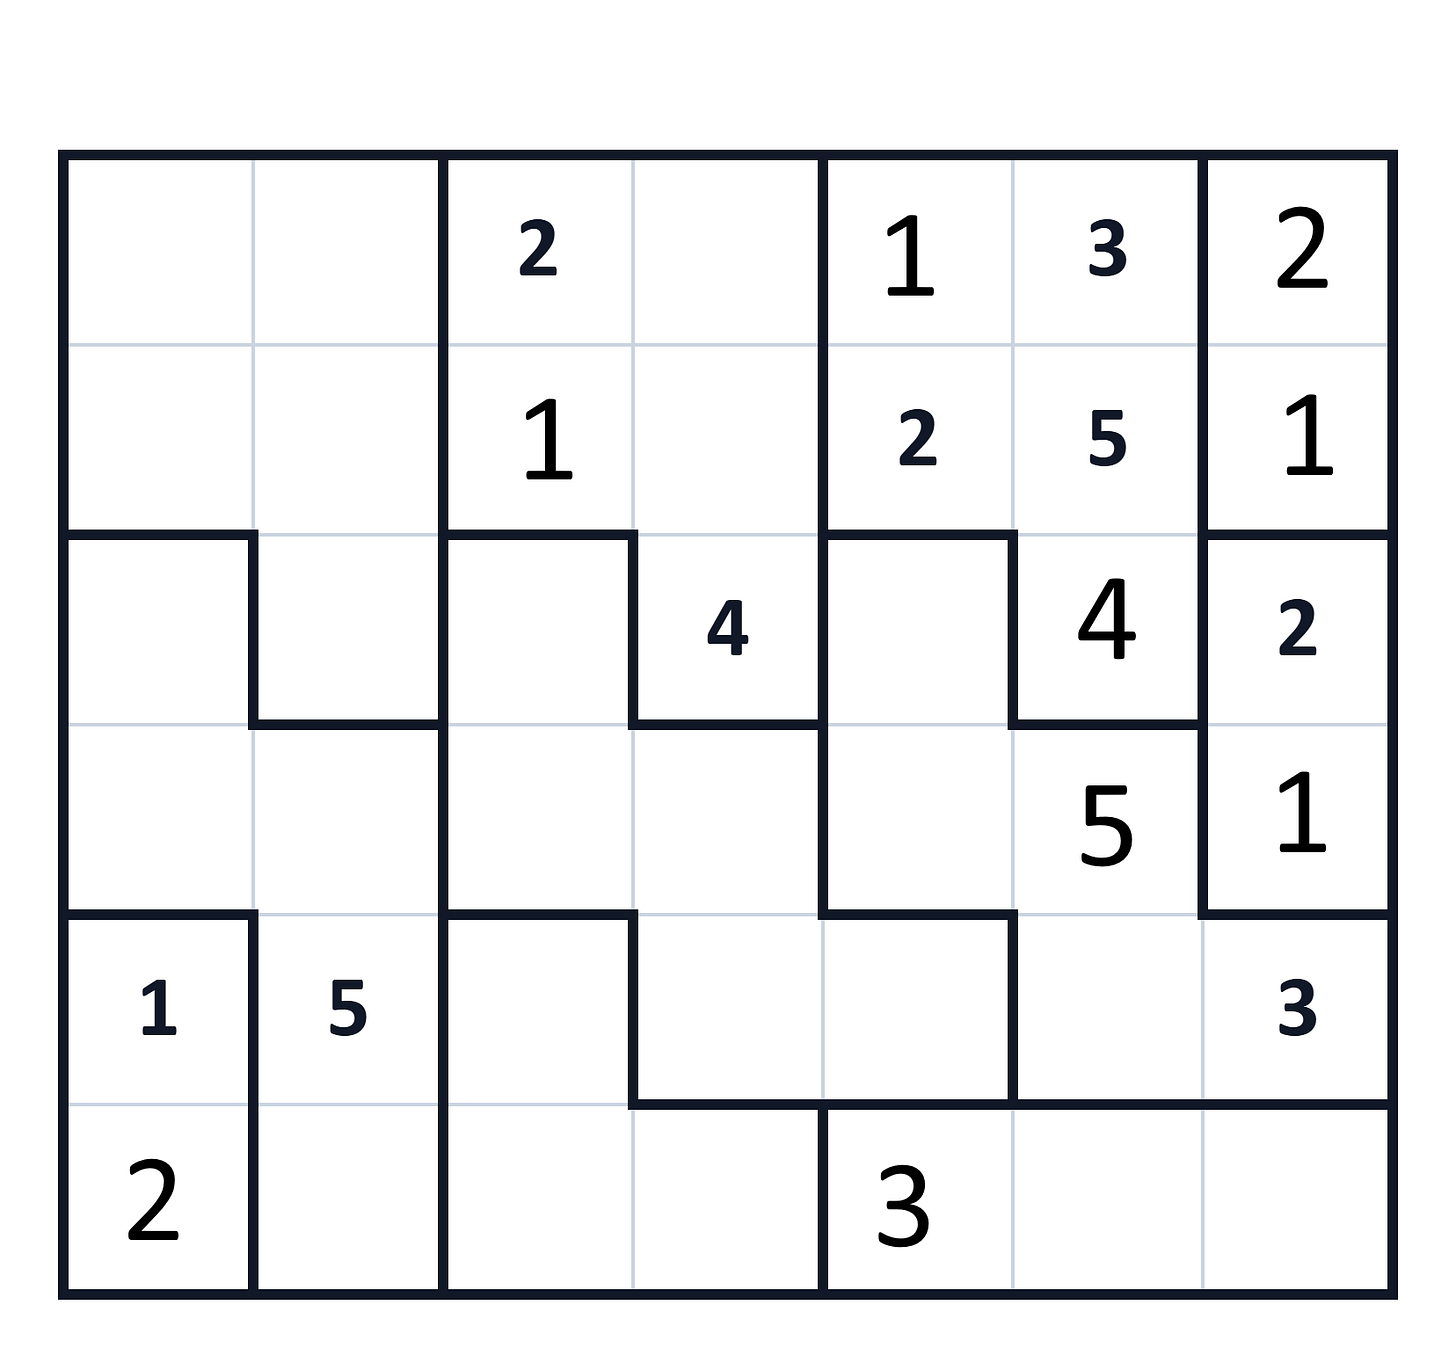
We can now fill the other numbers in this region.
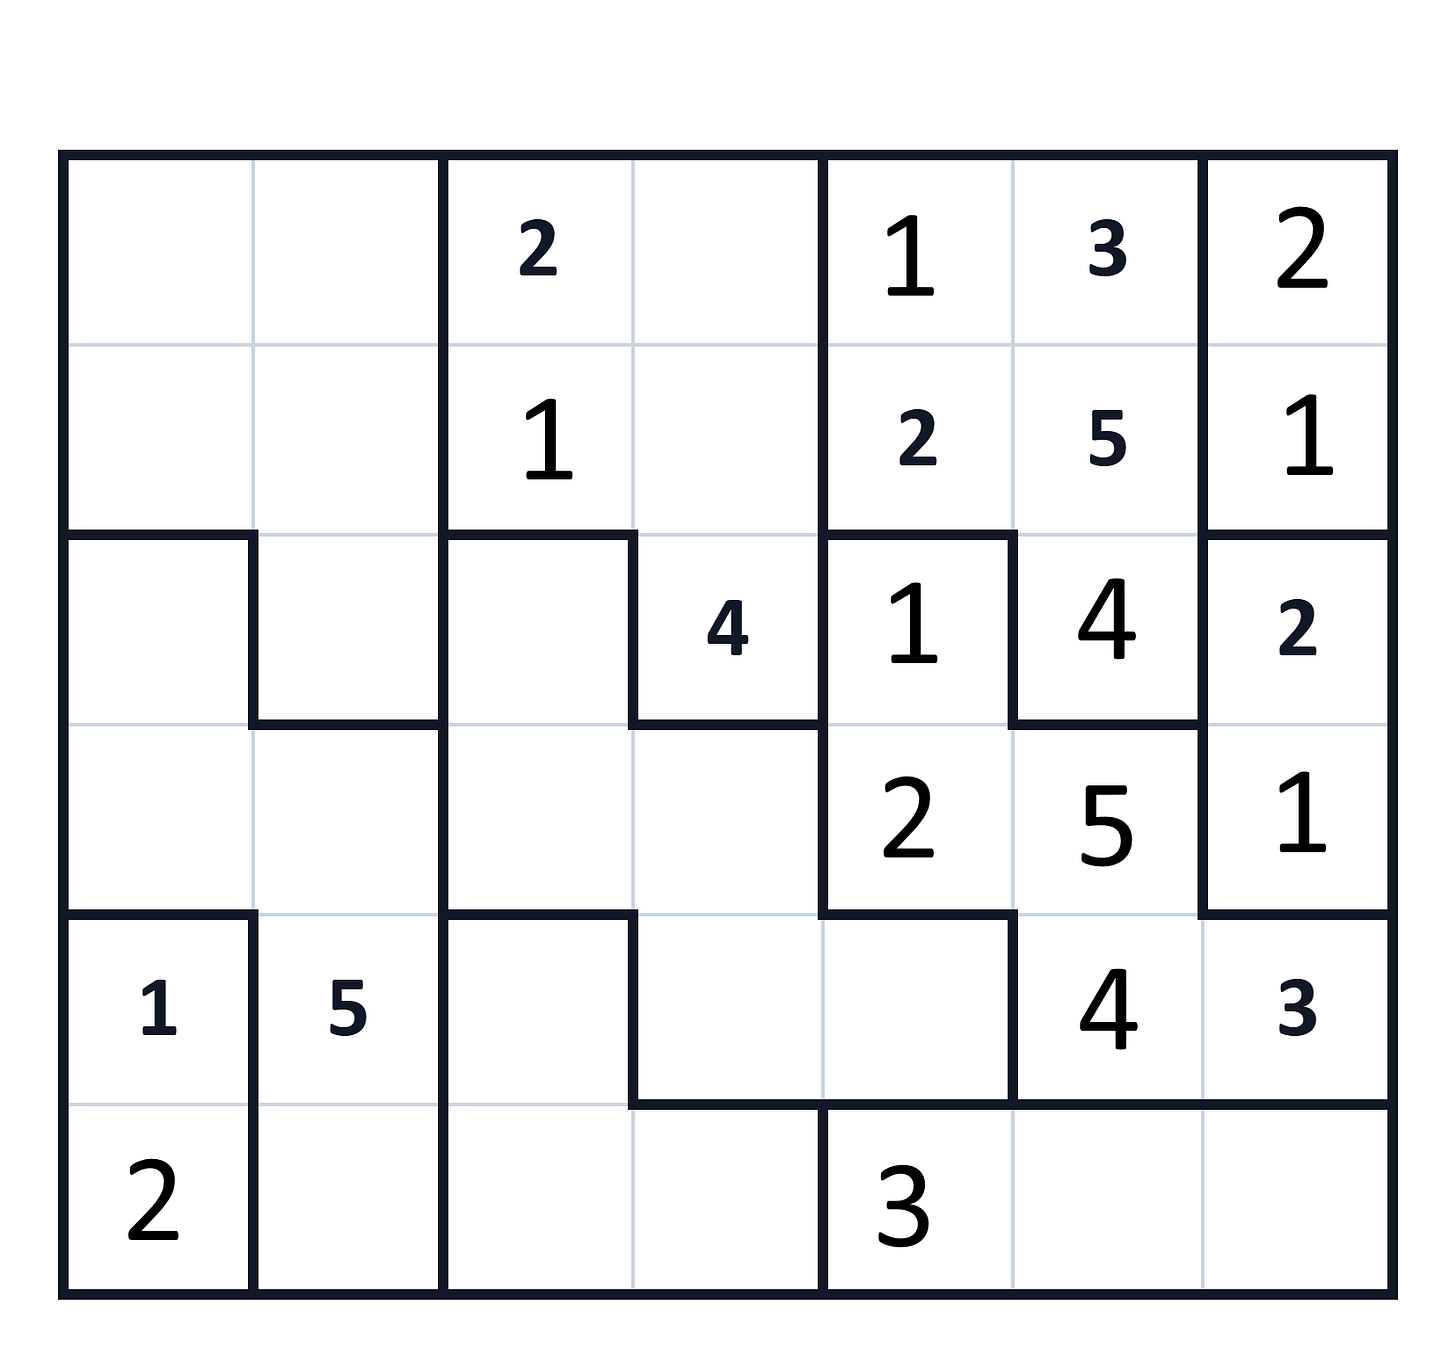
Cell R5C5 now also has only one possible number, which is 1. This then unlocks the bottom region, where we can fill in 1 and 2.
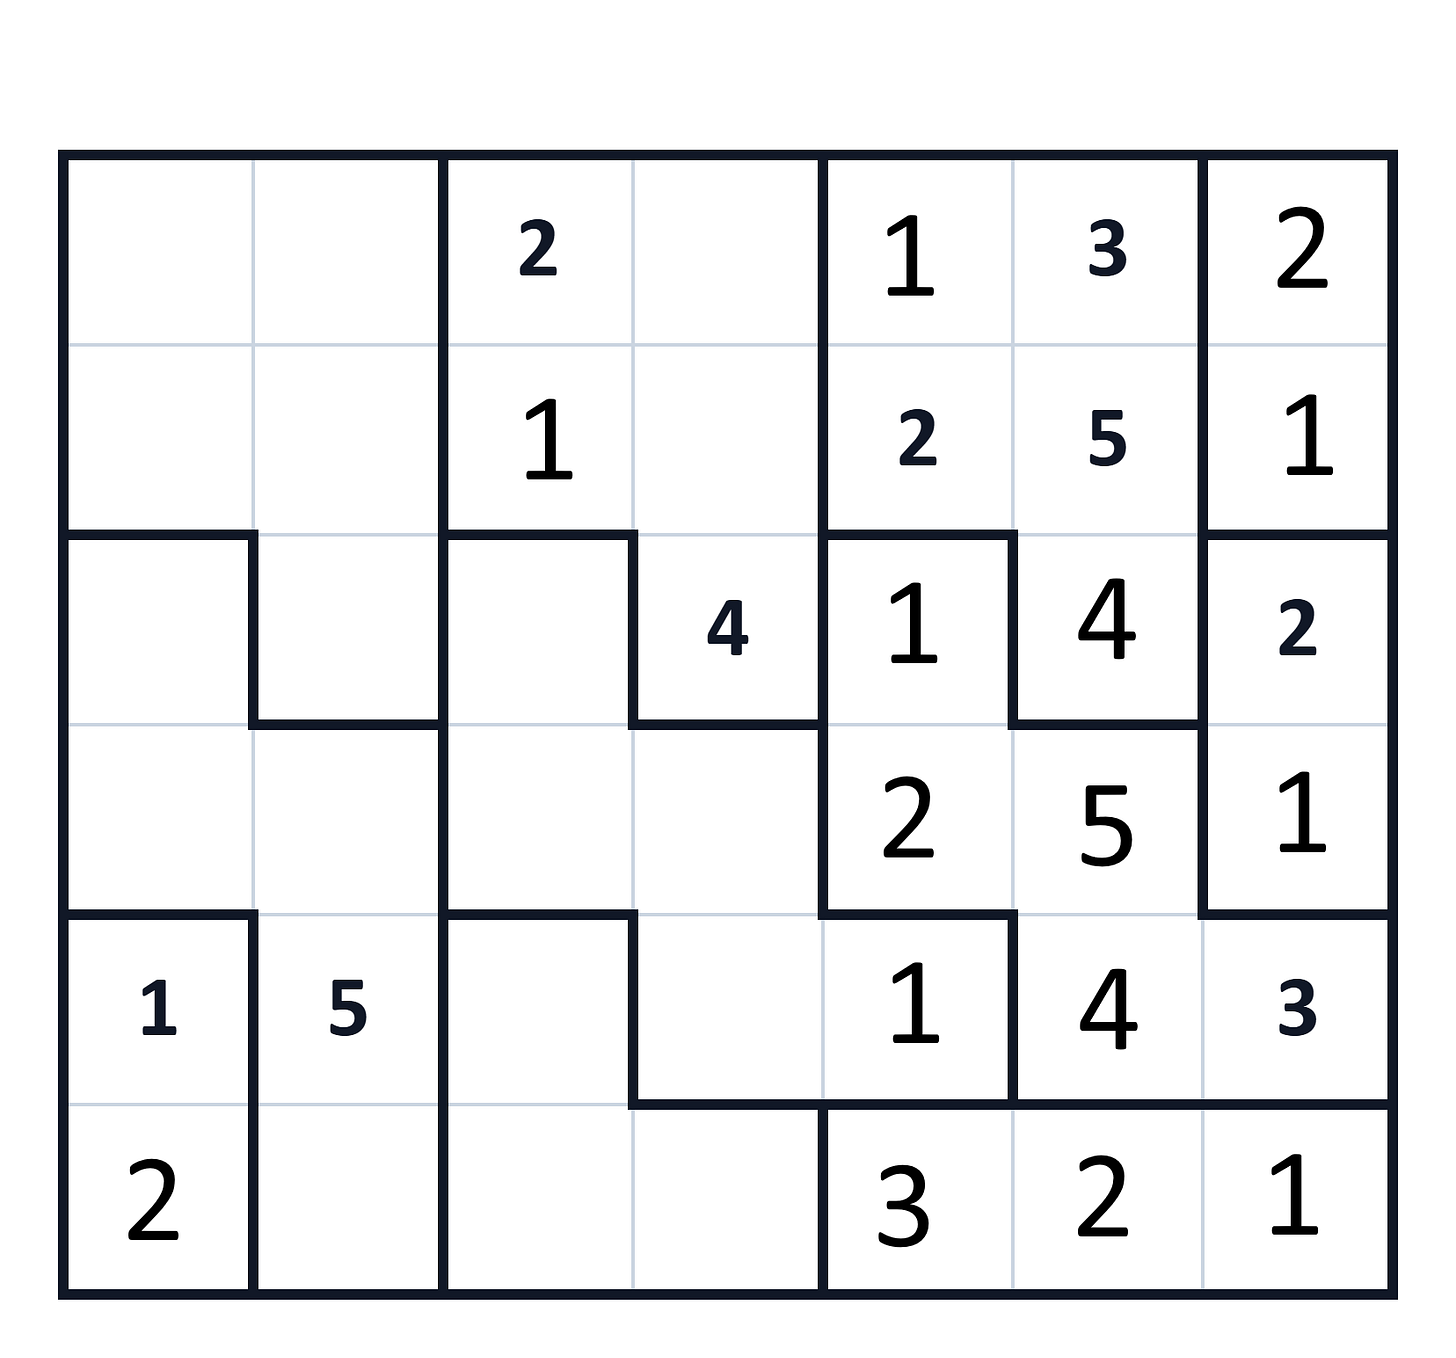
After this, we can fill R6C4 with 2 as the only number possible in this position, and we can write candidates for 1 and 3 in the rest of the region. We do this to help ourselves with the next step.
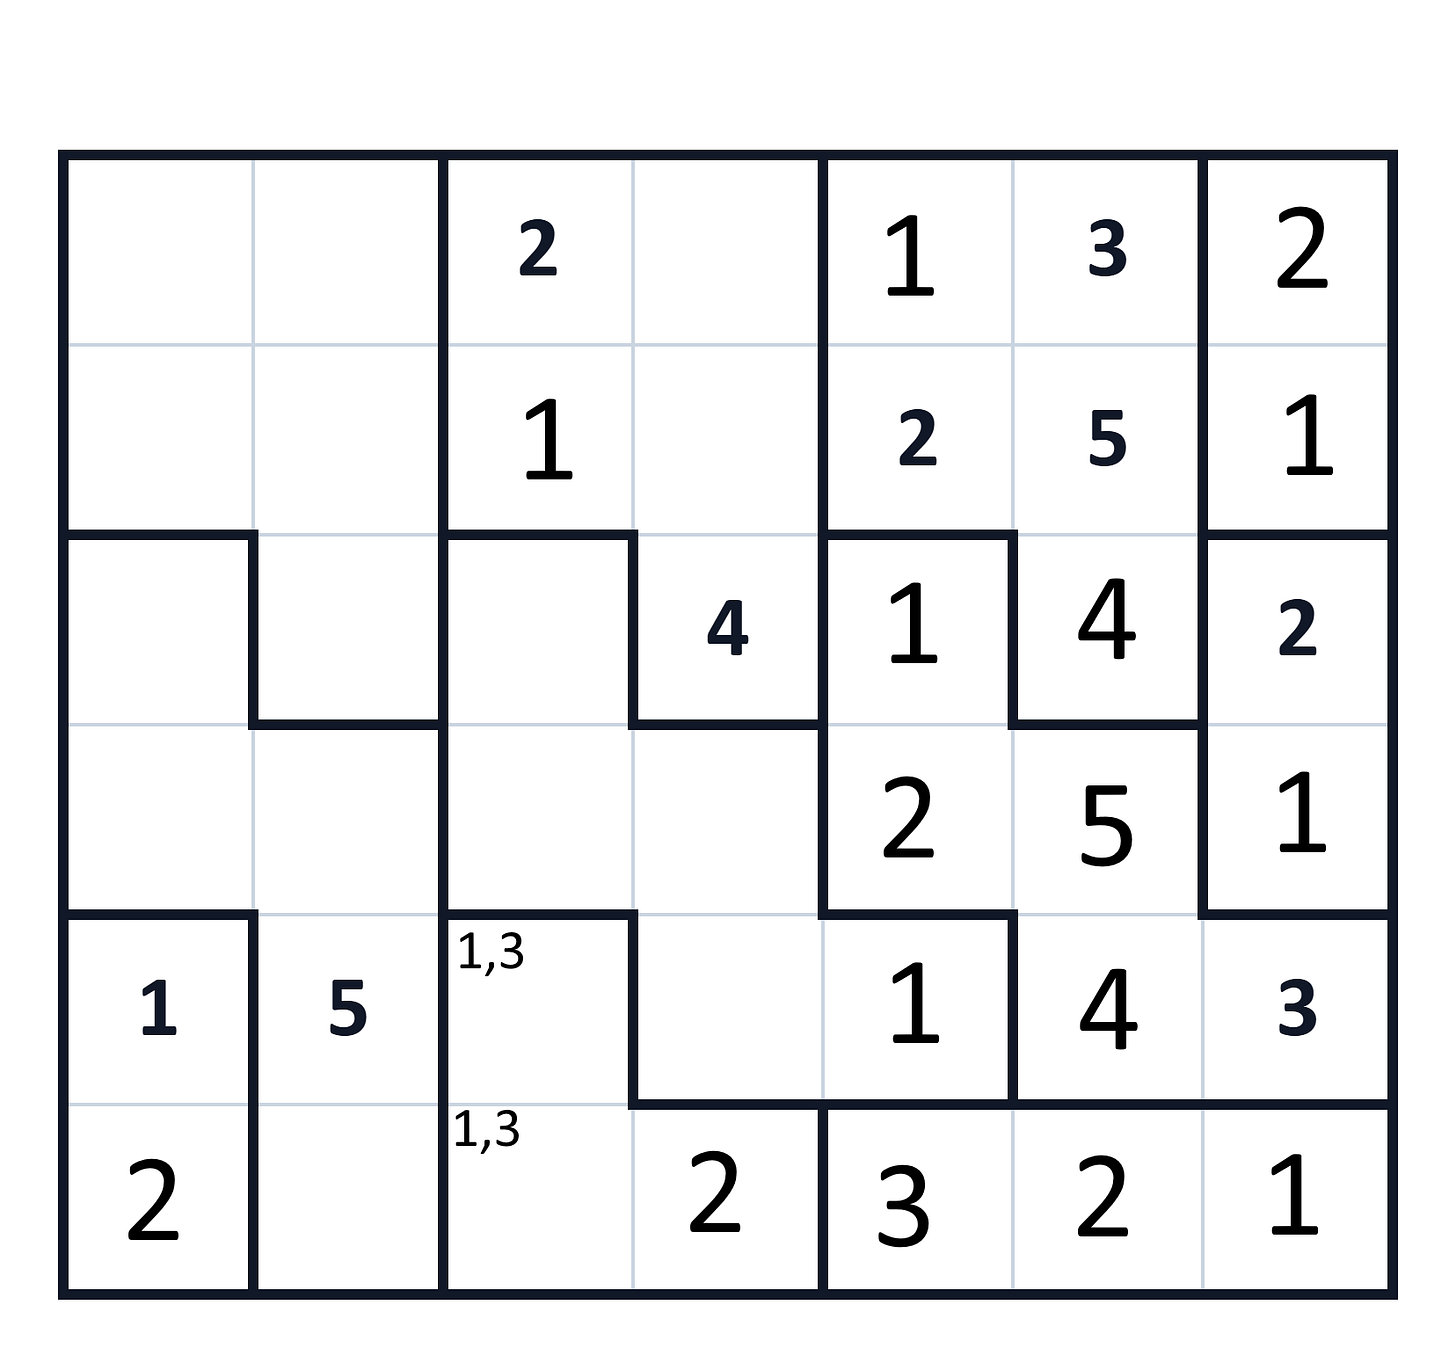
As we now focus on R6C2, we can notice that around this cell we have all the numbers except 4, so we can place 4 there. We don’t know the exact position of 3, but because both cells where 3 could be placed are neighbours of R6C2, we can also eliminate 3 as a possible candidate for this cell. In more advanced puzzles, this is one of the most useful techniques for eliminating numbers from cells.
We also mark the candidate cells for 2 in the middle region to help us later.
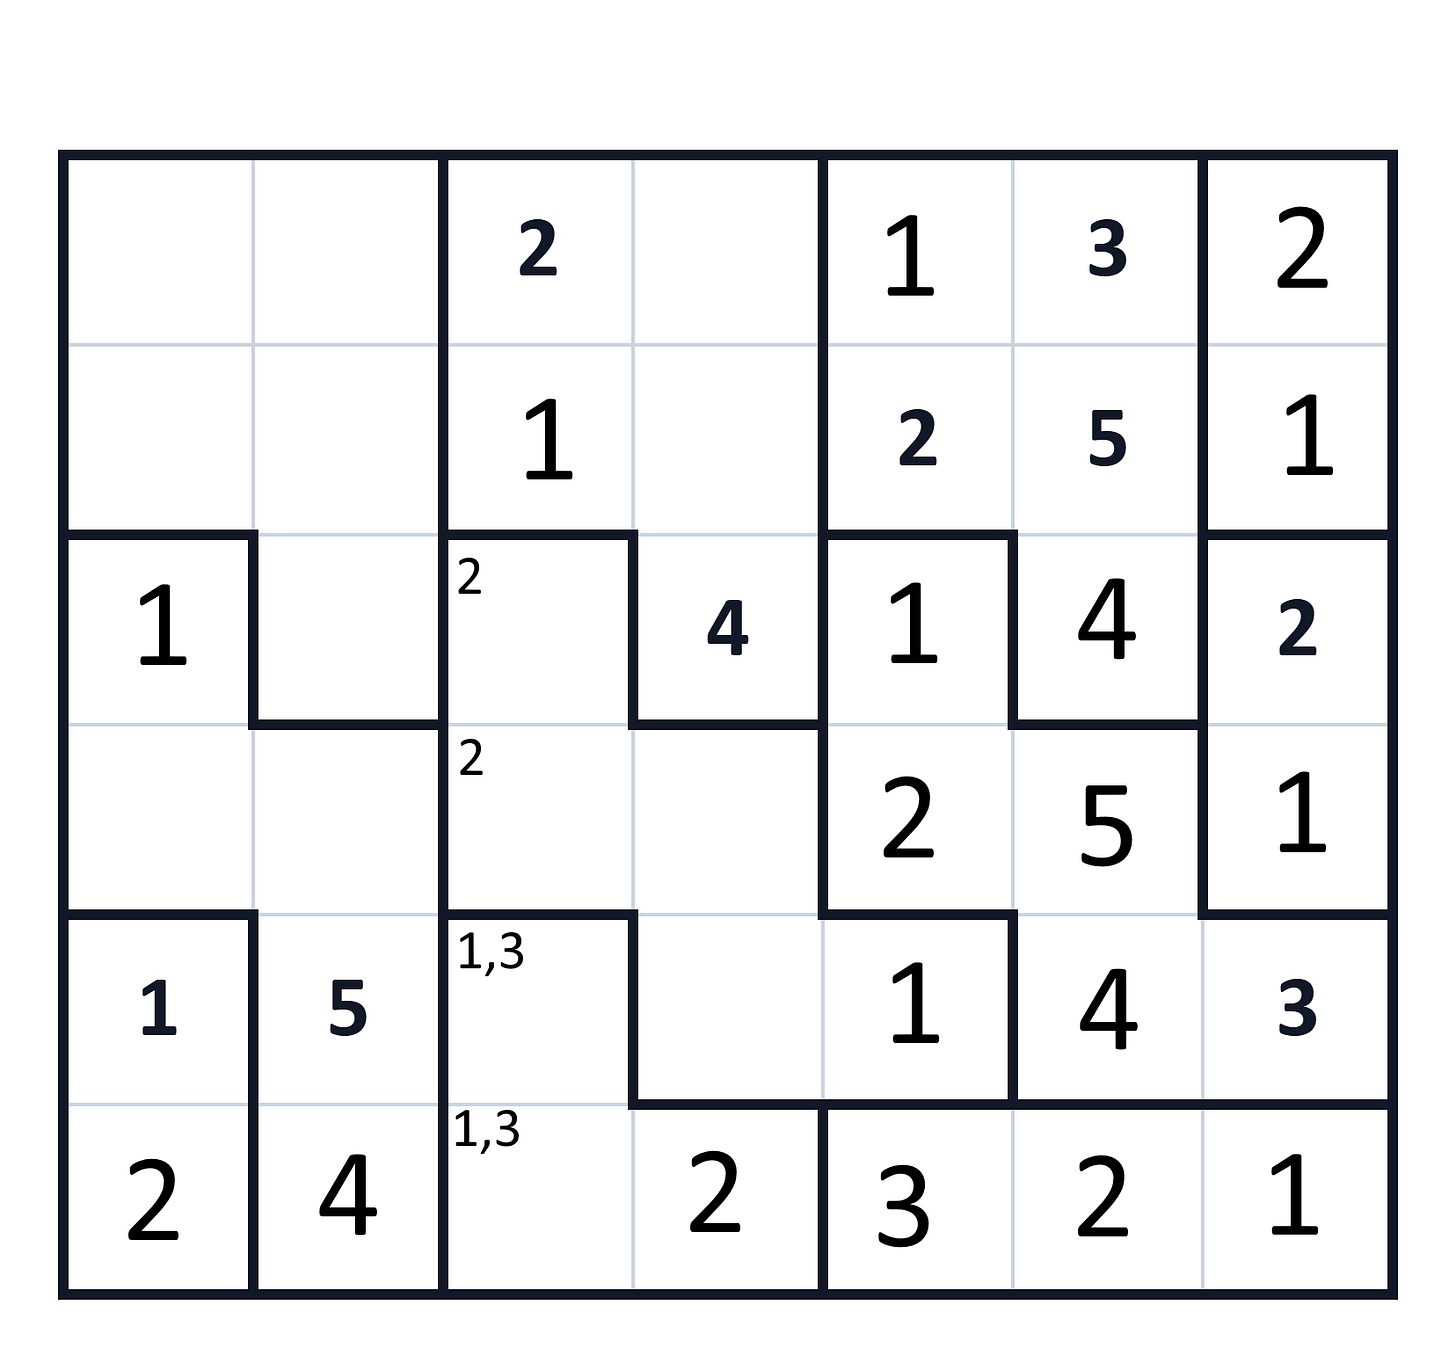
We can now finish the rest of the bottom-left region. The 1 can only be in R3C1, the 2 can only be in R4C1, and the last number is 3. This also opens up the position of 3 in R6C3 and 1 above it. After this, we can fill the region above it with 3 and 4.
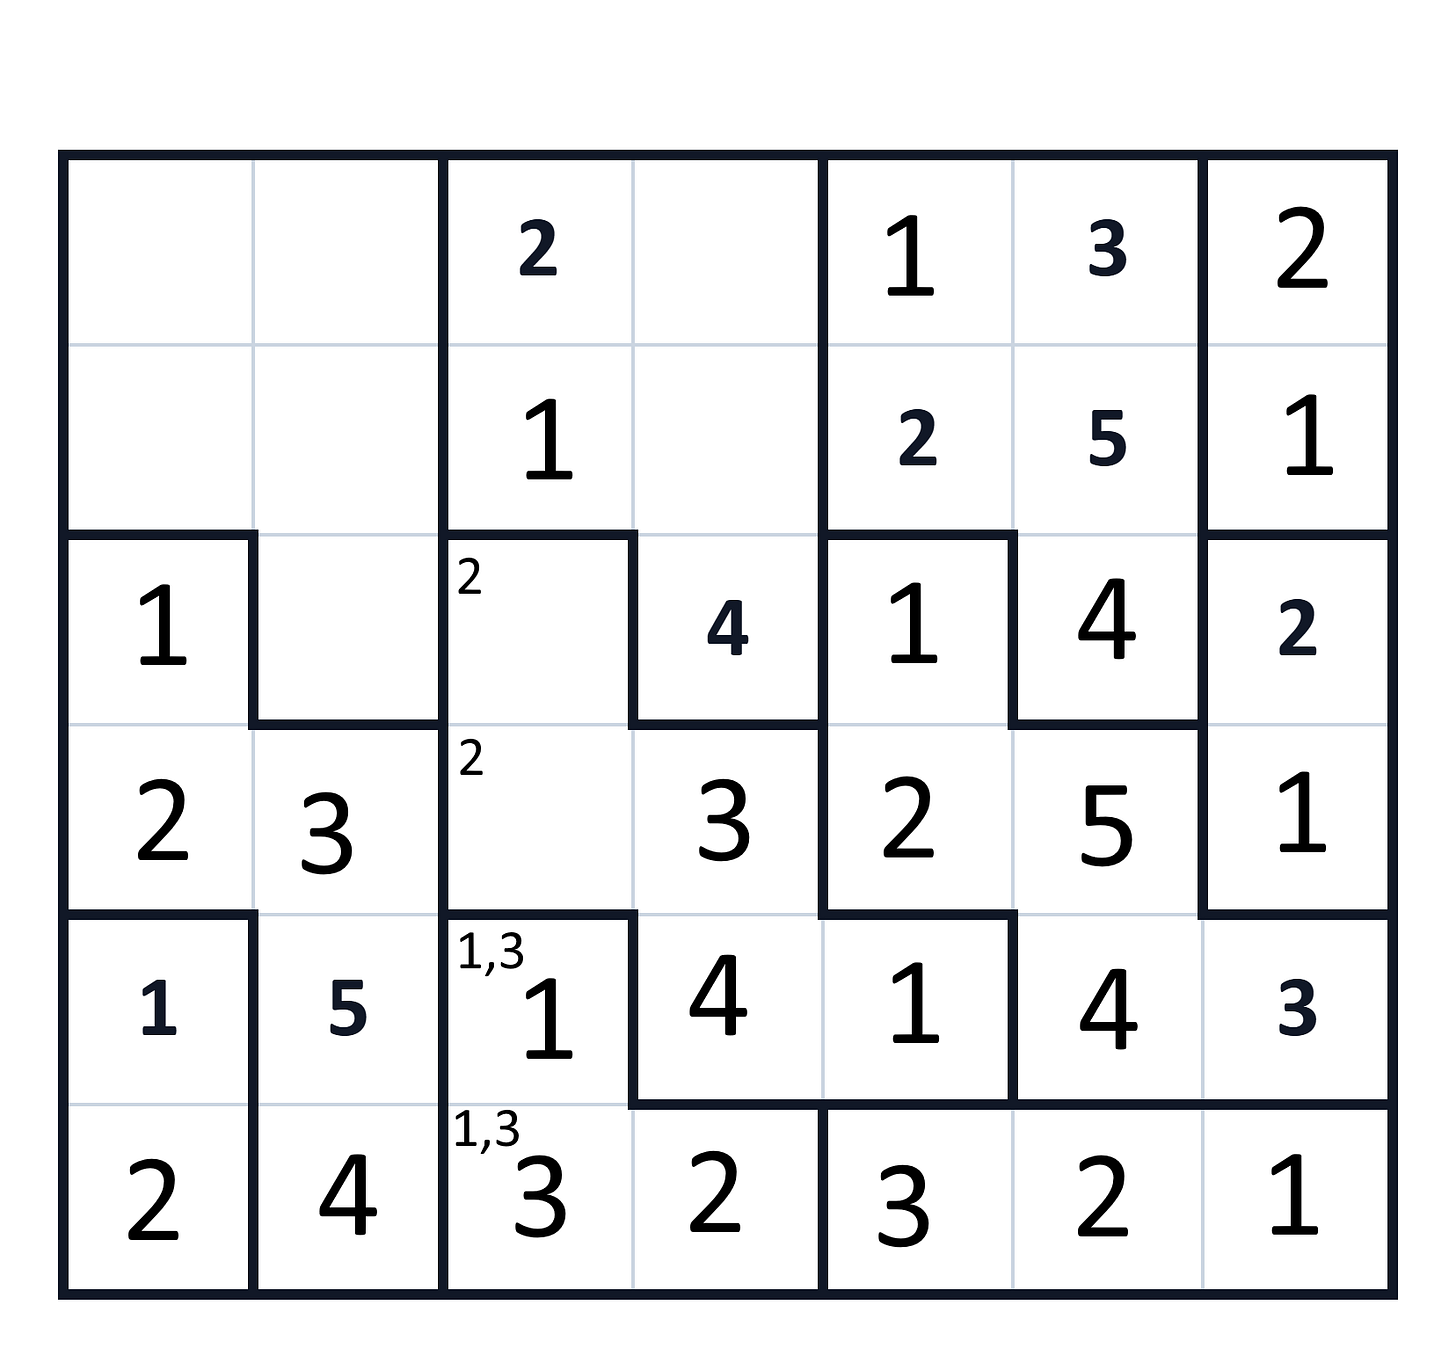
Things gradually start to fill in one after another from here without too much trouble.
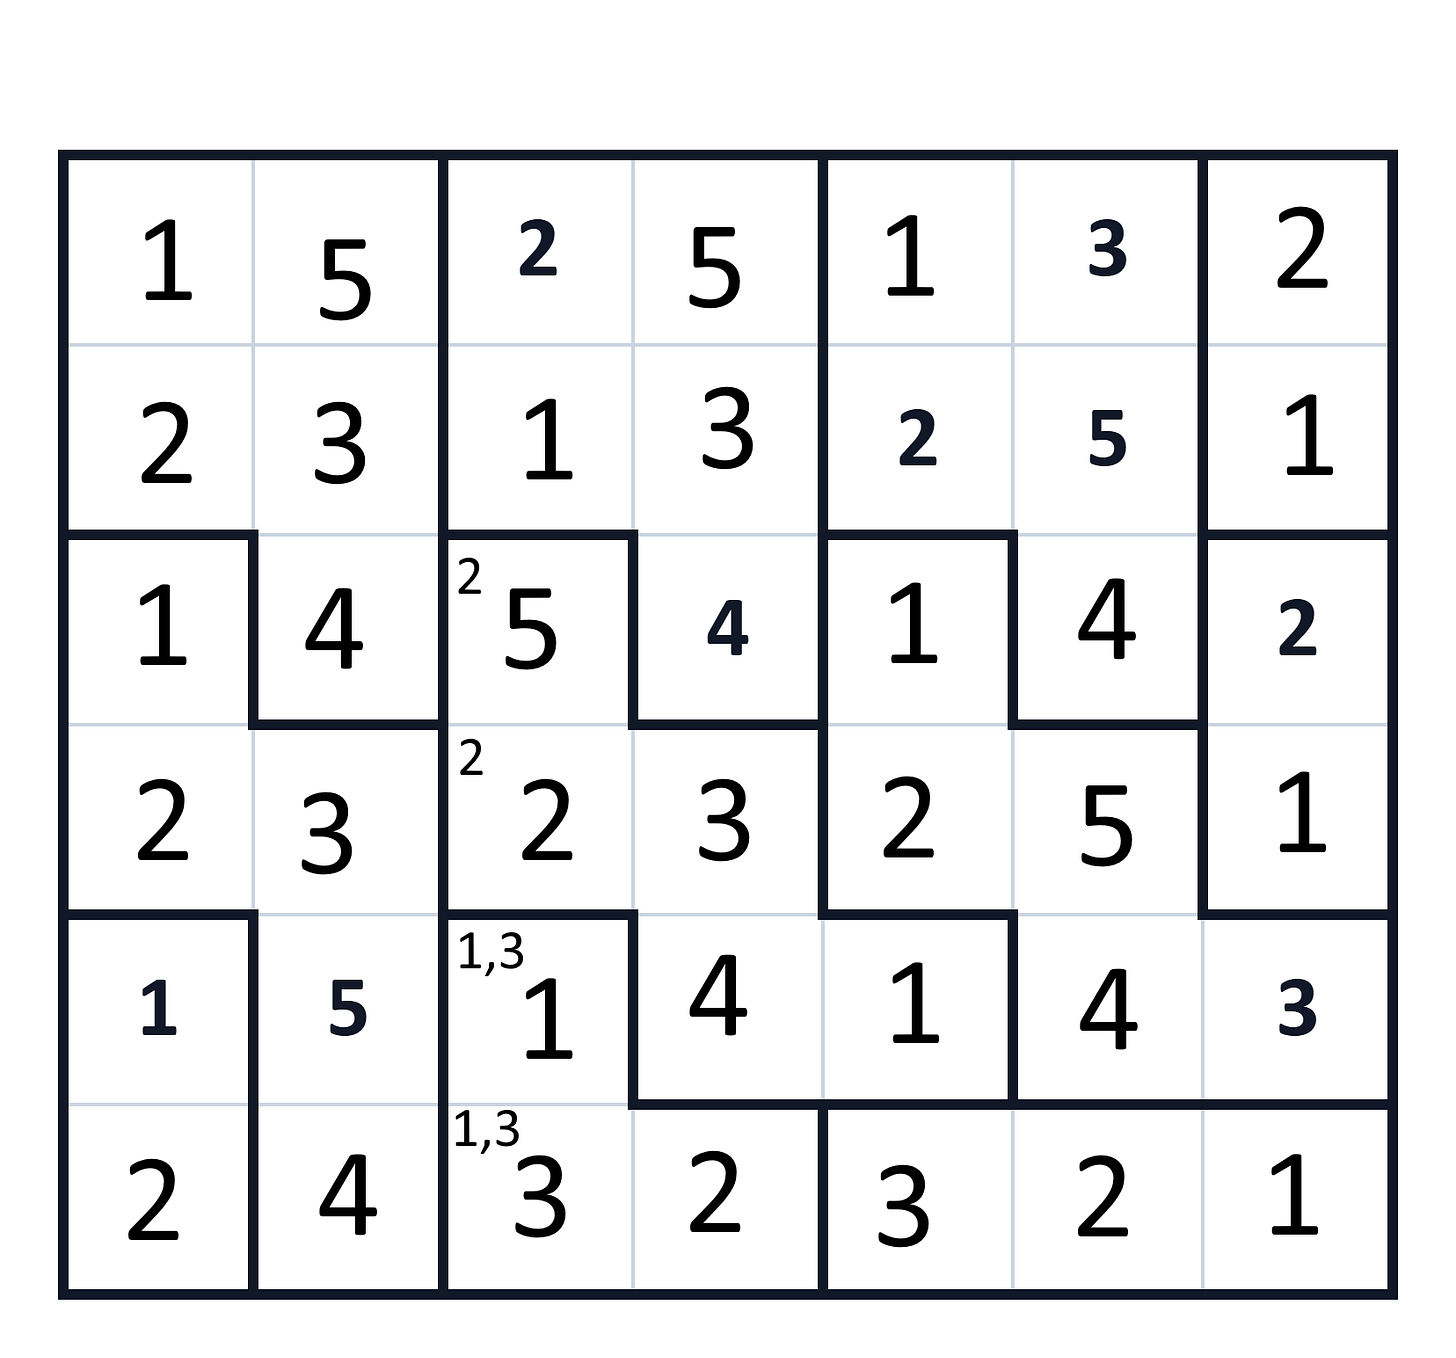
This was a relatively simple puzzle, so I hope you got the basic thinking behind it and that it will encourage you to start solving a few simple ones, then move on to harder puzzles and discover your own solving tricks.
Variants
The simple rules of the puzzle make it great for other people to work with and create their own variants. So out there you can find many different variants derived from this puzzle.
Some of them combine thermometer lines with Tectonic to add another constraint for placing numbers. Another direction is changing the grid from square to hexagonal, which is an almost standard variant for many puzzle types. There are combinations with sum cages, similar to Killer Sudoku, and there is even a complete reversal of the puzzle where you are given the numbers but need to draw the regions.
So if you liked the original puzzle, there are enough variants to explore and see if any of them suit you even more.
I hope that if you hadn’t come across this puzzle before, this article was interesting enough to make you try solving one on your own and explore other similar puzzles.
For the end, I leave you with one of the puzzles so you don’t have to search for one to get started.
Happy puzzling!